I like to make. Obviously.
I also like to inspire others to make. We are all learning artist created by the most wonderful artist.
So, today's D.I.Y. Project is a watercolor doodle card perfect for Easter, a birthday, or just to encourage someone.

Make these with less than 10 supplies
The first thing I did was gather all of my supplies and set up on my desk. The supplies you'll need for this are:
- watercolors•these can be any kind you'd like, I'm using my cheapest ones
- brush & water cup
- cotton circle or napkin to dab your brush dr
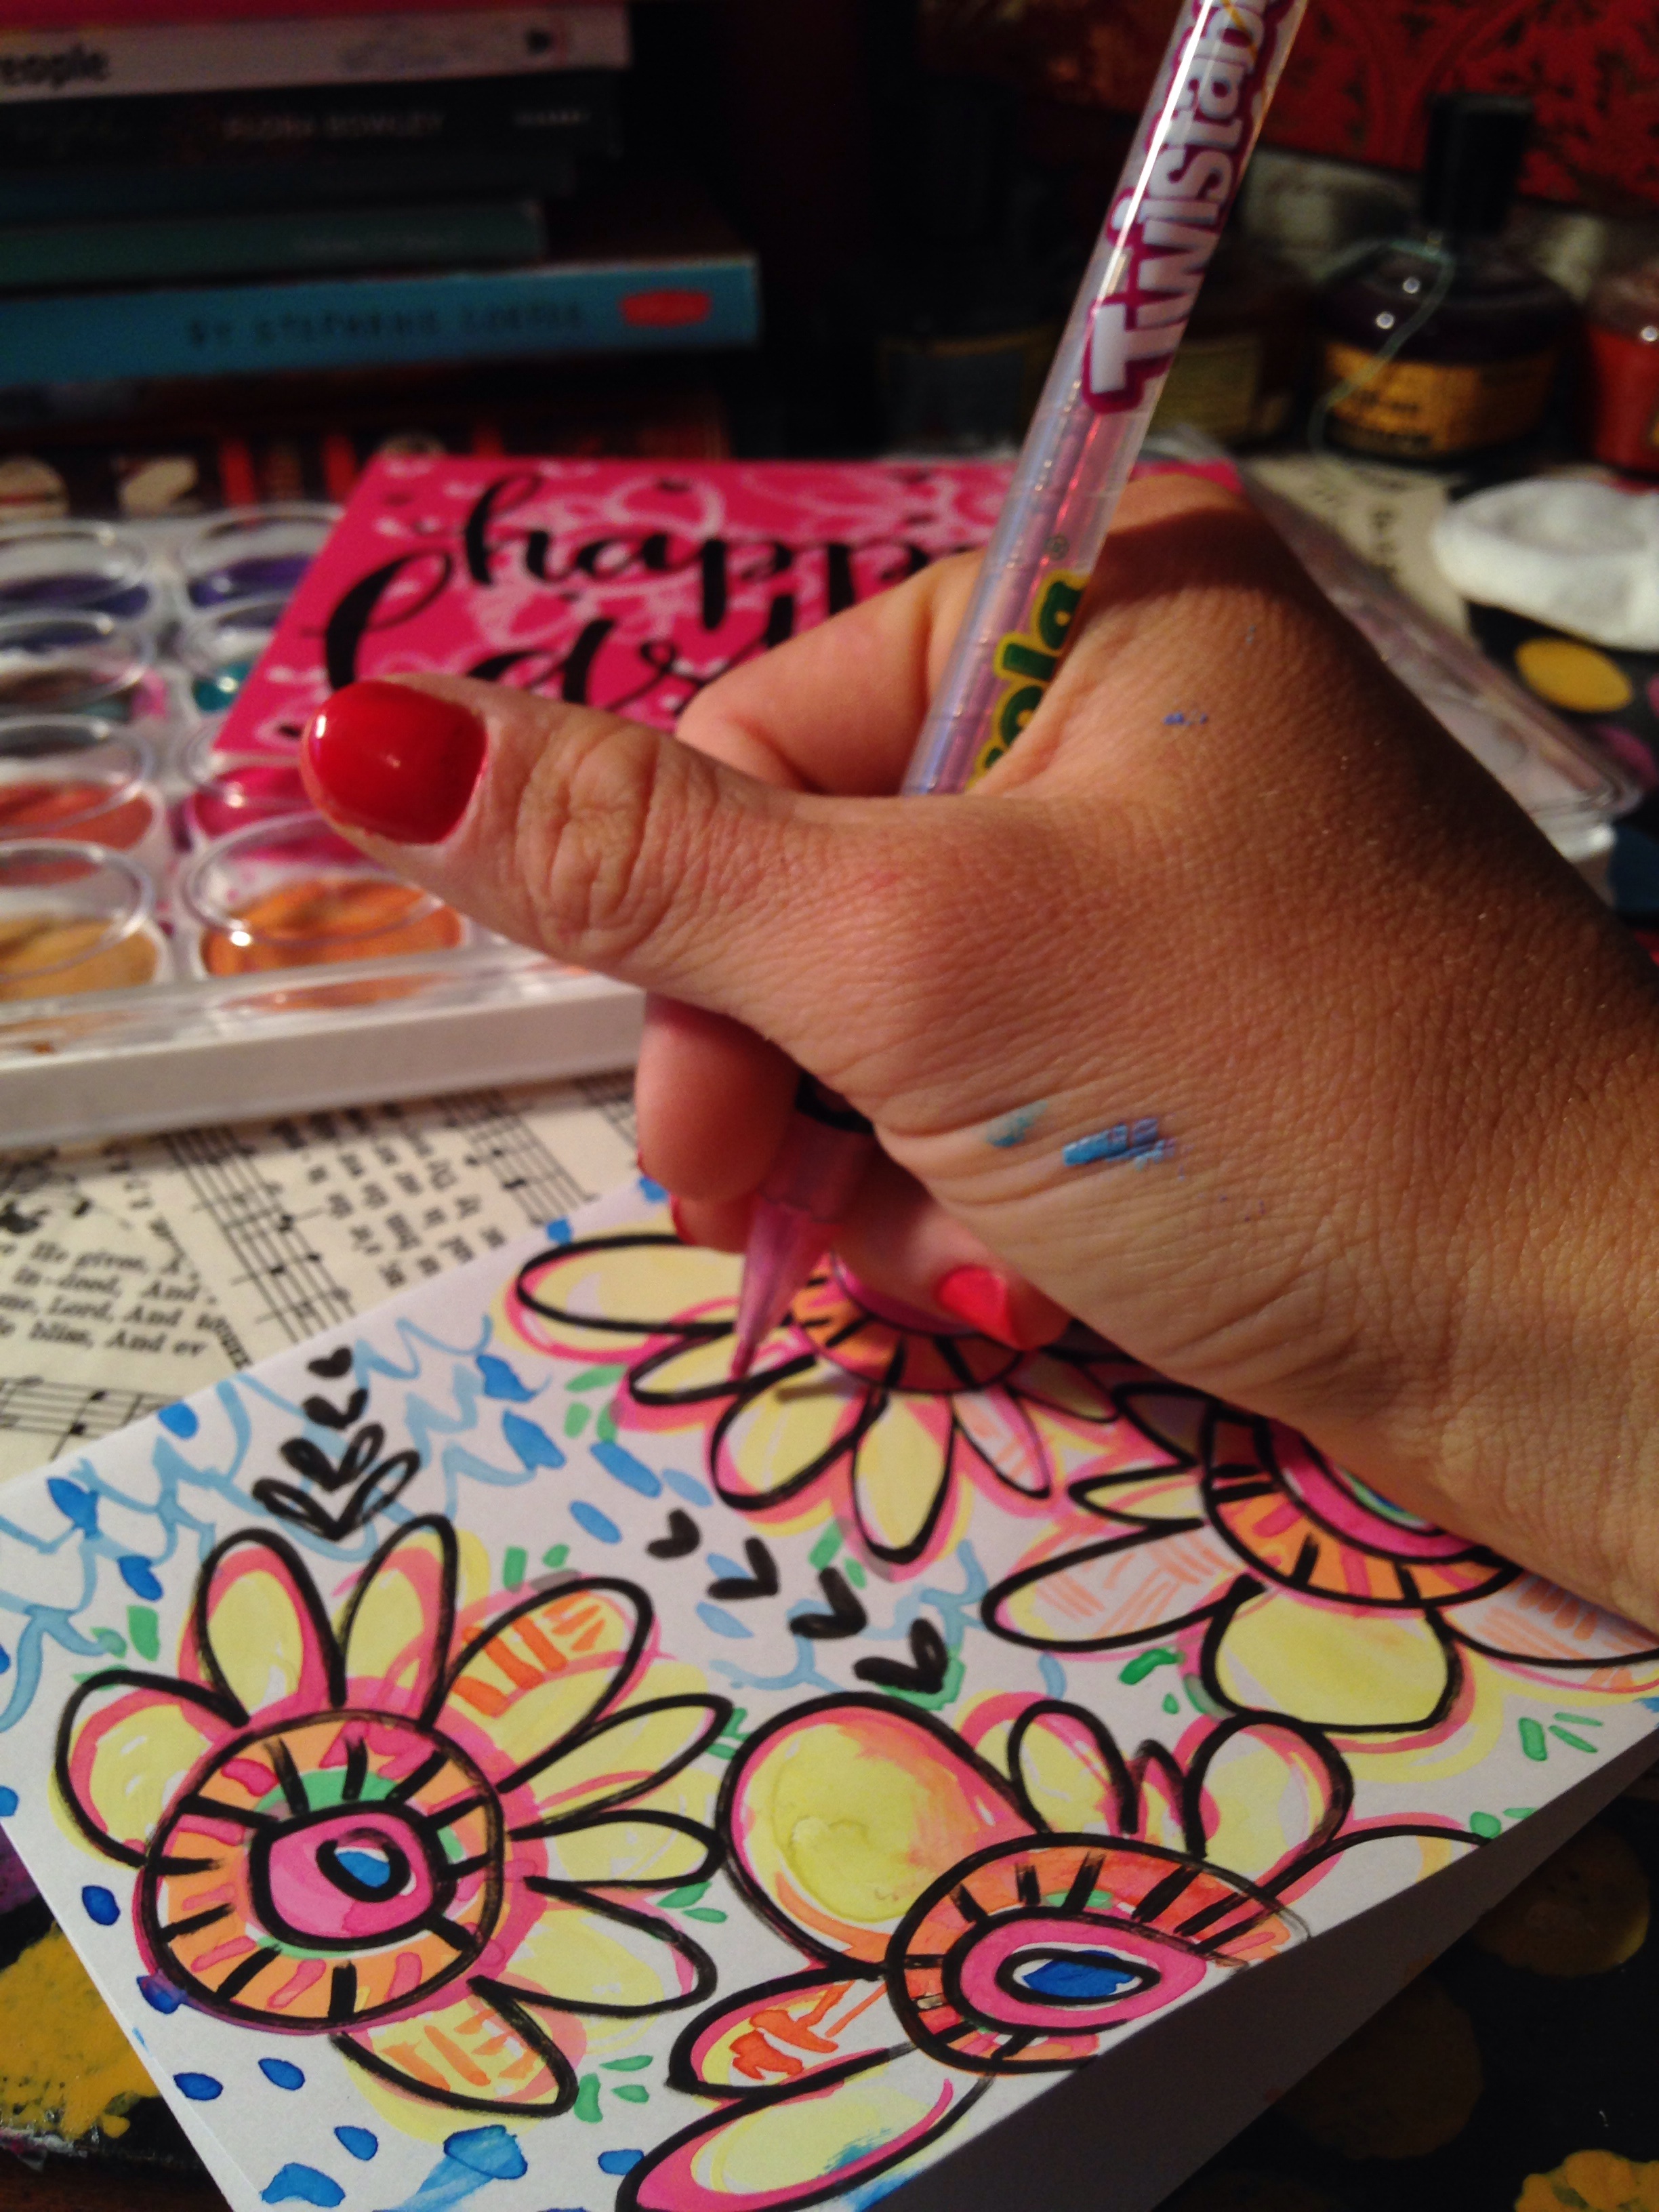
- crayola twist-able colored pencil or any other colored pencil
-2 blank card
- assorted pens of your choice • I'm using Faber Castell itt Pens. My sizes are Medium, Brush, and the big white Pitt.

you can find cotton circles by cotton balls at any store-- they make pretty brush cleaners if you ask me.
Step 1: Wetting your watercolors & Begin Drawing

Add enough water to your colors of choice that you can see it mixing together. If you have too little water your colors will be chalky and won't go on smooth. More water is better than less water in this case.
So, now that you've wet your color begin making a series of 4 smaller circles on your card that are spread apart..


after you have your first 4 circles down, wet your brush in your water cup, dab your brush on your pad and then pick up a new color with your brush. I picked orange as my second color to go around my pink.
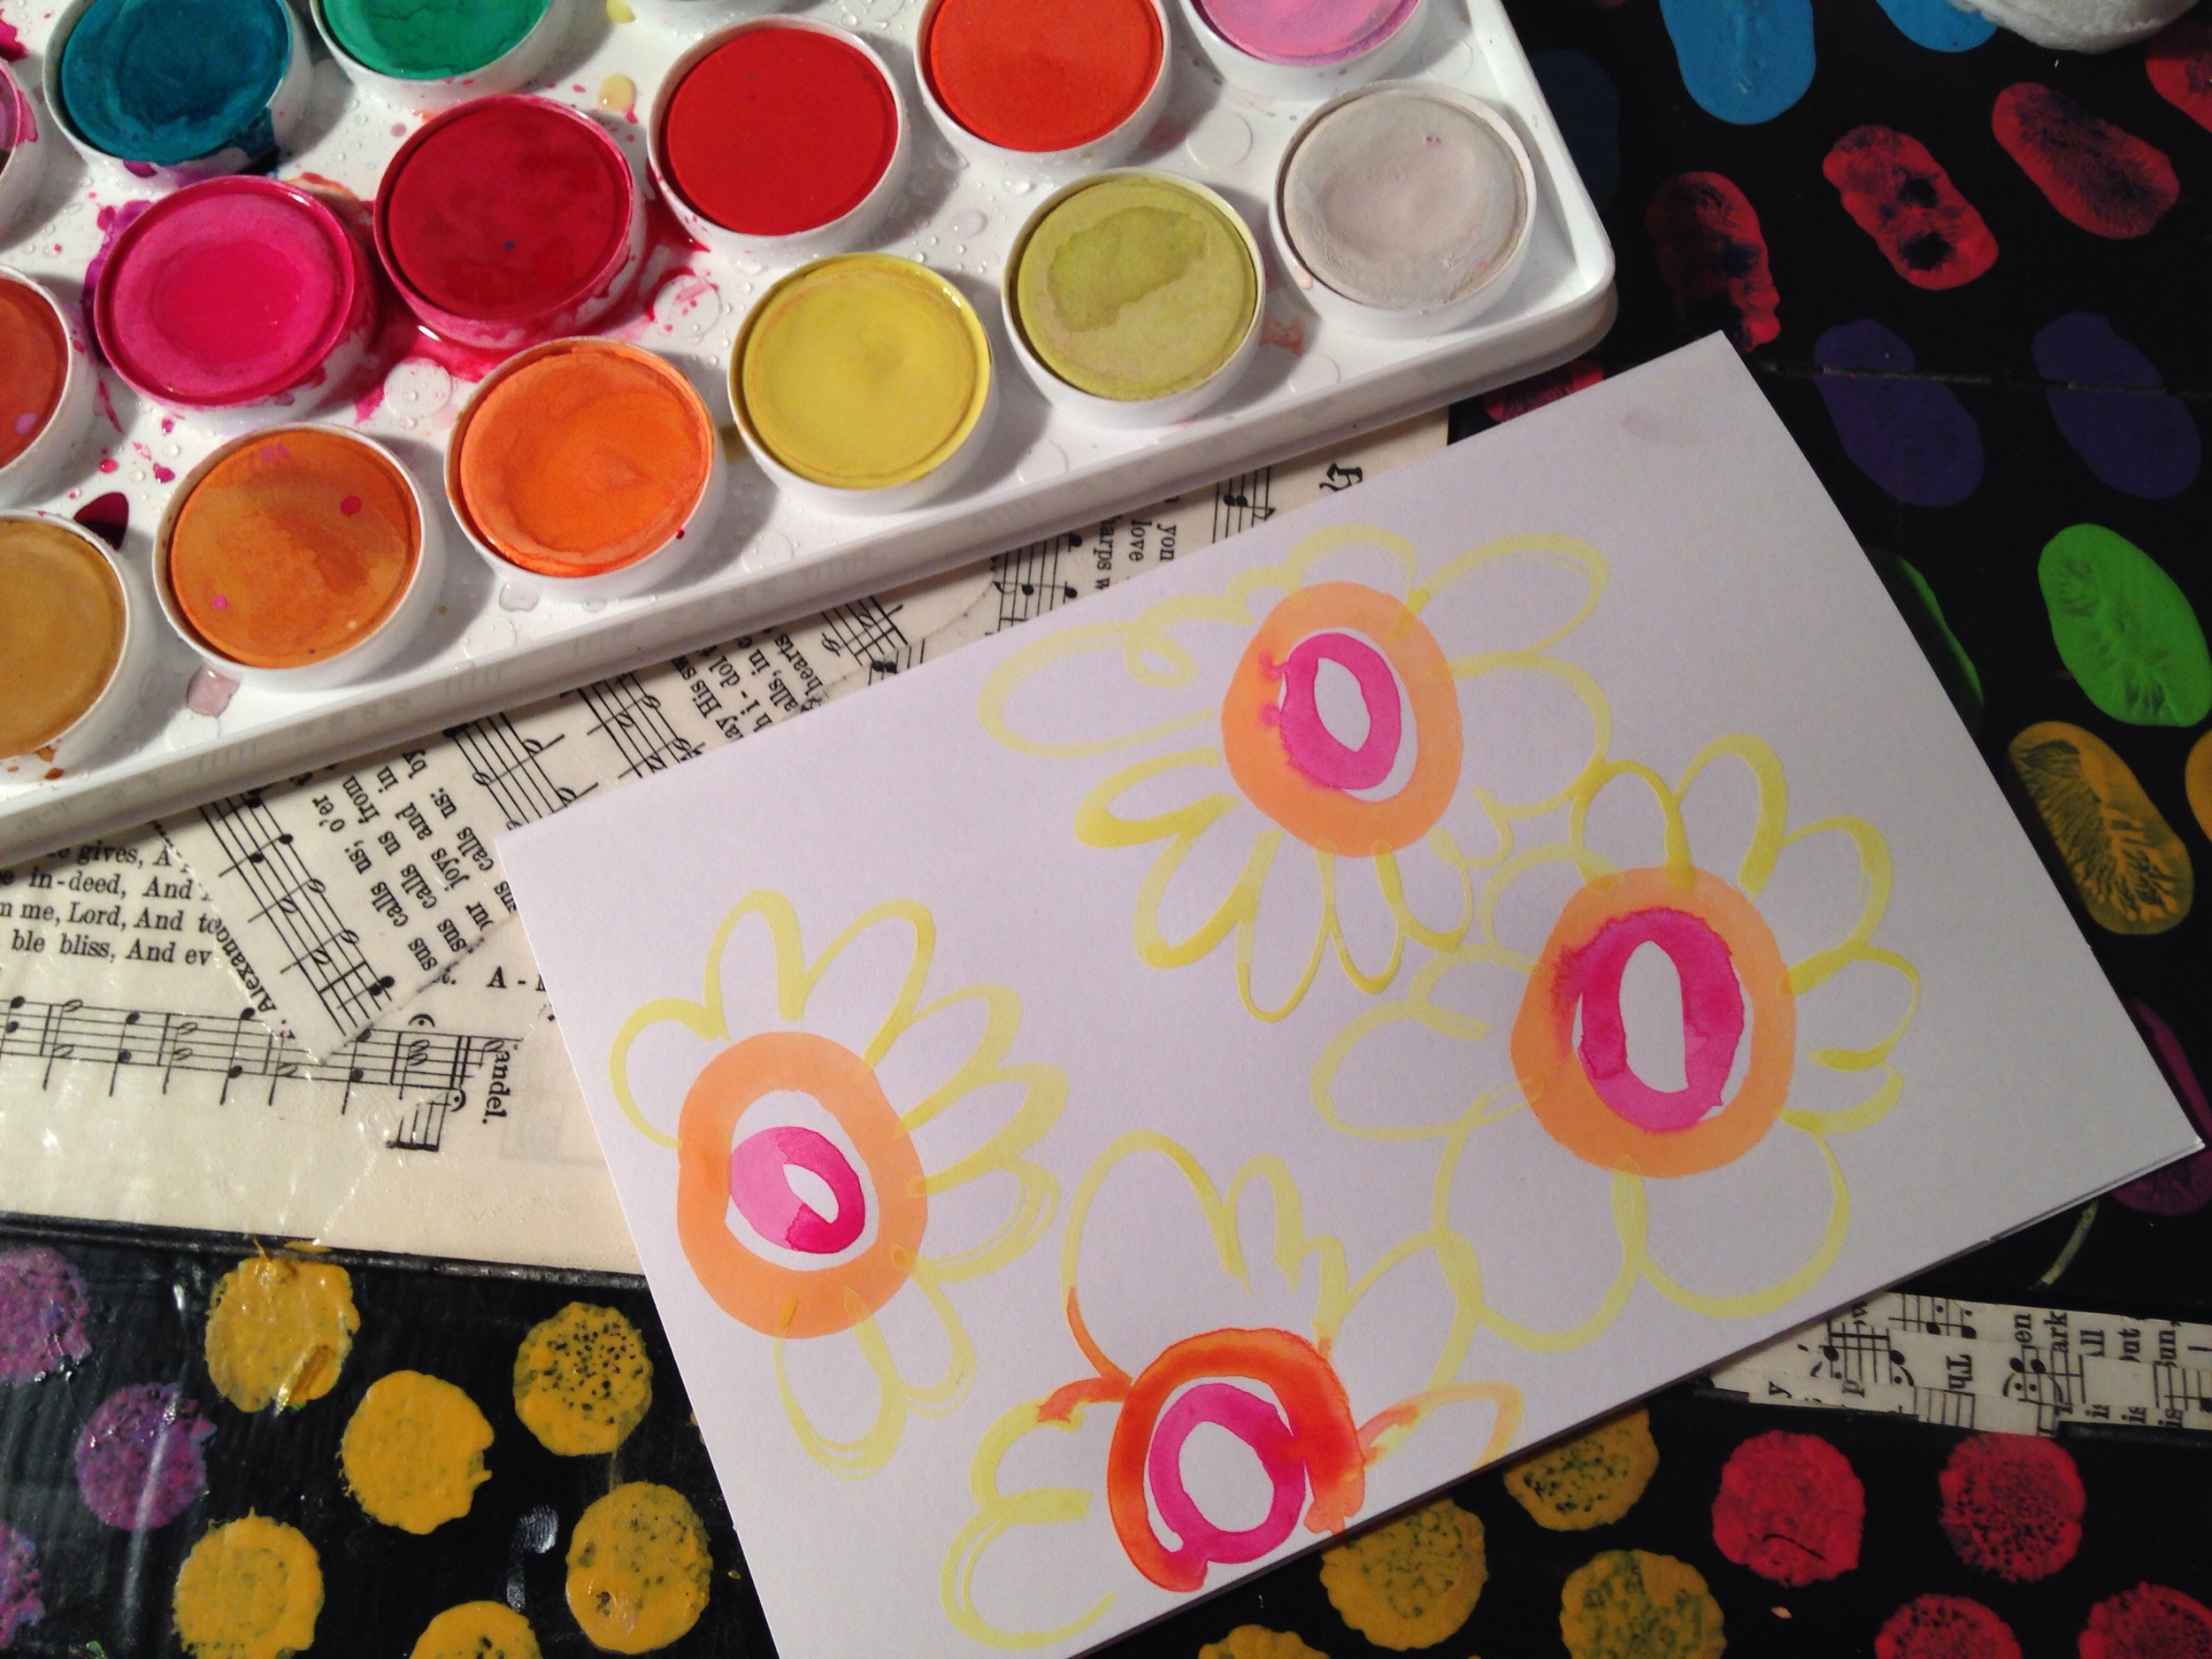
embrace the bleeding of colors!
In the above picture I loaded my brush with yellow and did a swirl floral pattern around my outer orange circle. I don't really low at this point what I'm going for but I'm starting to like it. You can't mess up... It's art.
Now, once your swirly floral design are down, clean your brush and load up another color.. I picked green and started making baby leafy things around my "petals" and then loaded with blue and made waves & a couple of dots.
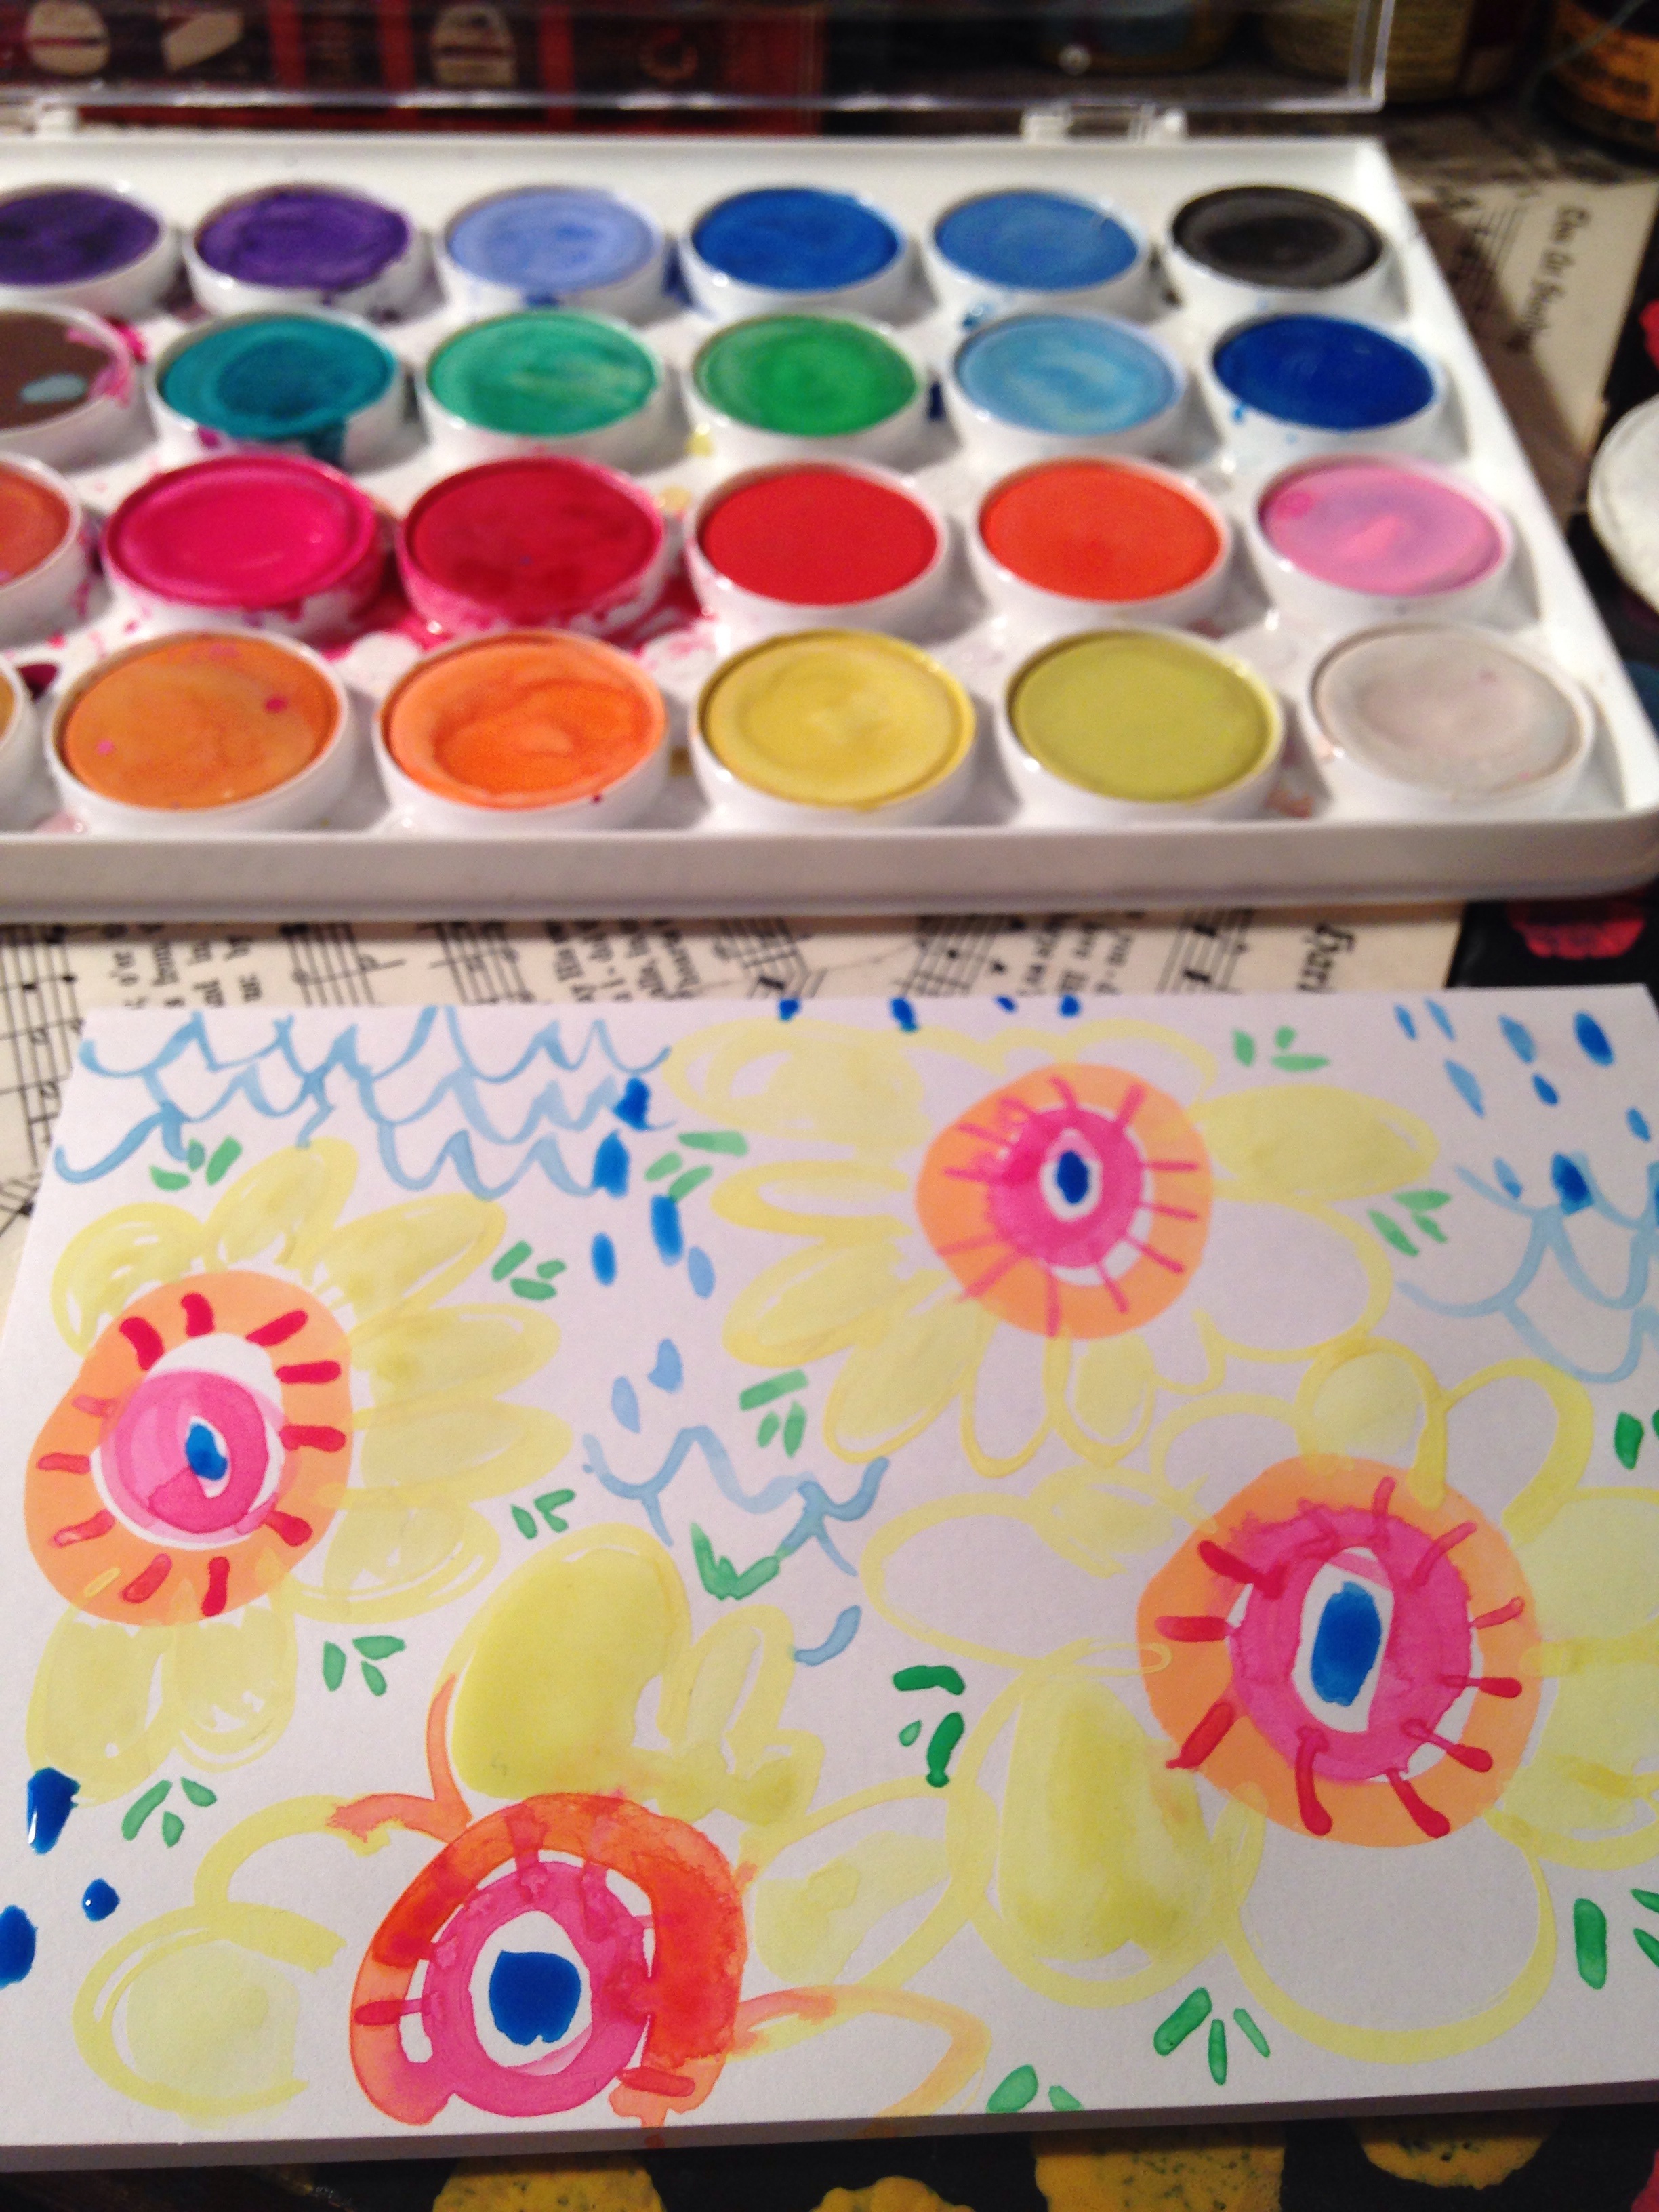
you can go back through to the dry parts and add watercolor details like I did here using pink lines on my orange circle.
Now begin "doodling" on paint inside your petals and circle. You can do this with any color really but I've found that a color that is next to another on the color wheel works best-- that being said I doodles orange lines inside my yellow petals.

While it dries grab another card and start doodling on it with your white Big PITT pen. You can see my at the end.
Once your card is dry you'll be ready to start the next step.
STEP 2: DETAILS & IN
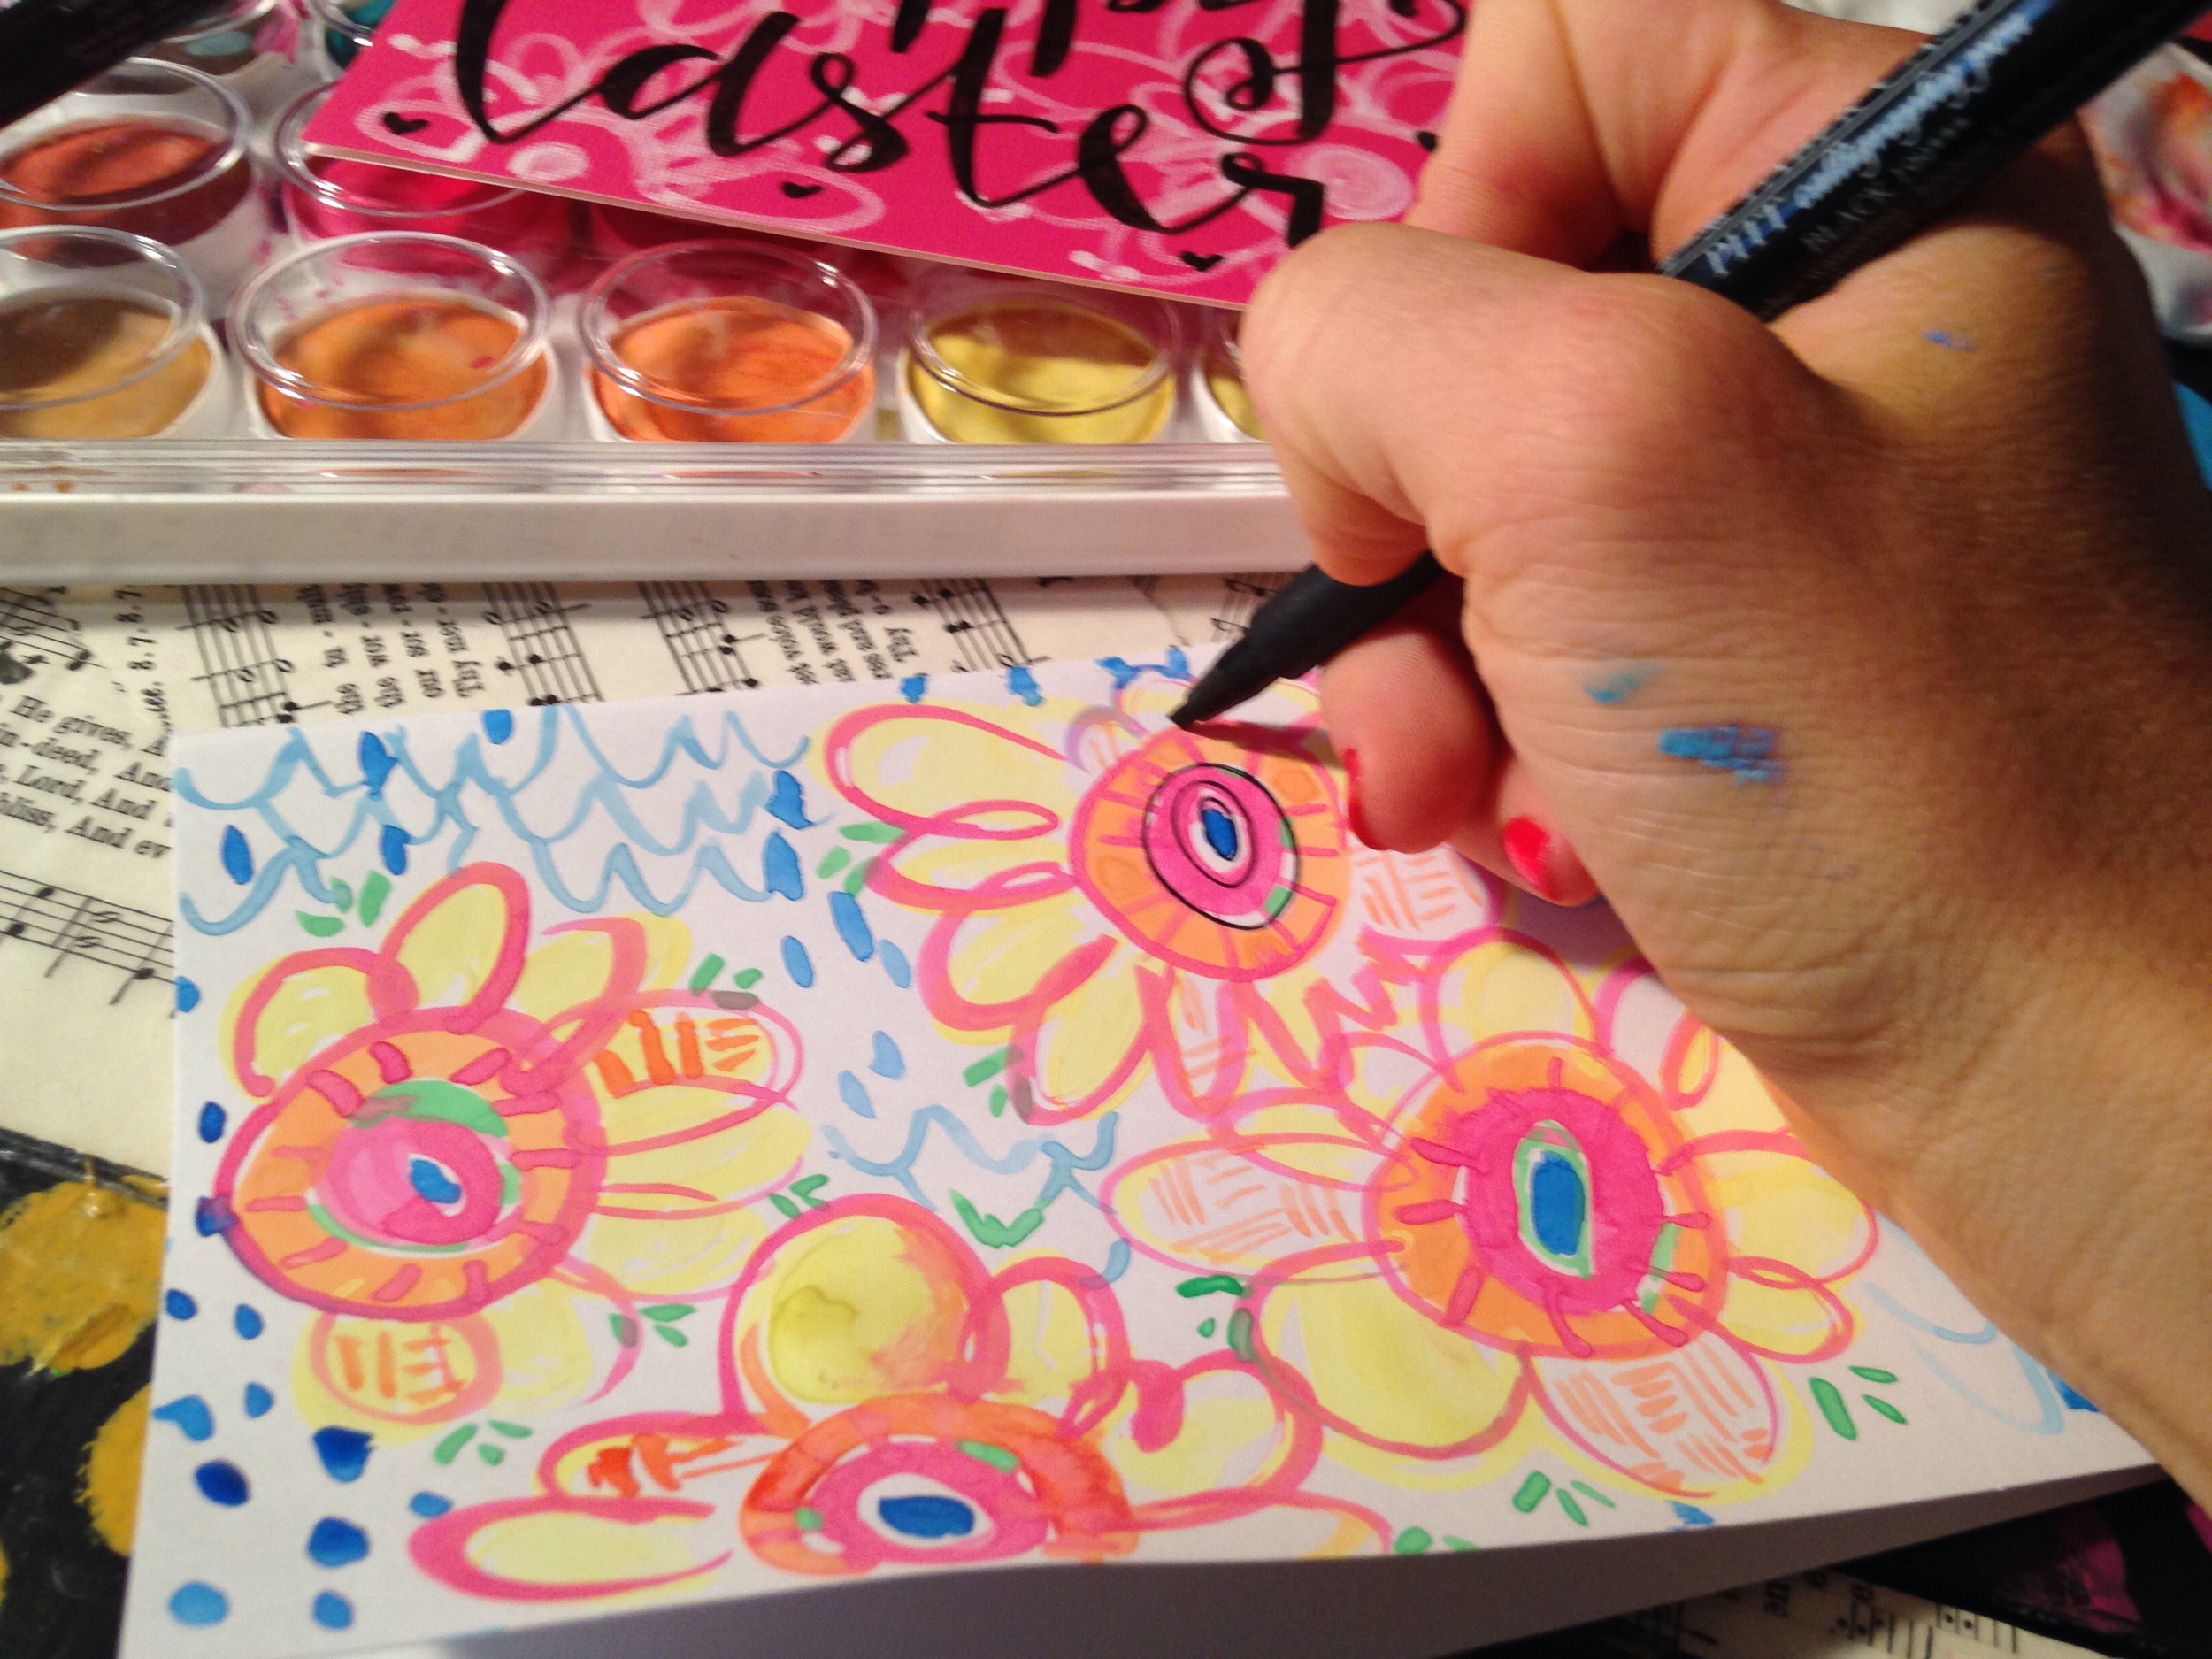
I just start drawing around what I've painted. Don't stay in the lines here--- imperfect is pretty.

After I have my outlining finished I grab a twistable and start coloring in space. I like color so the more there is the bigger my smile gets. Go color crazy, you can't mess it up.

See that smudge of blue in the bottom left--embrace imperfect and go with it.

Do some pattern play--add polka dots and zig zags or HEARTS, my favorite!!
Once you're done coloring and doodling and inking with your pens. You're ready for the next step.
STEP 3: LETTERING
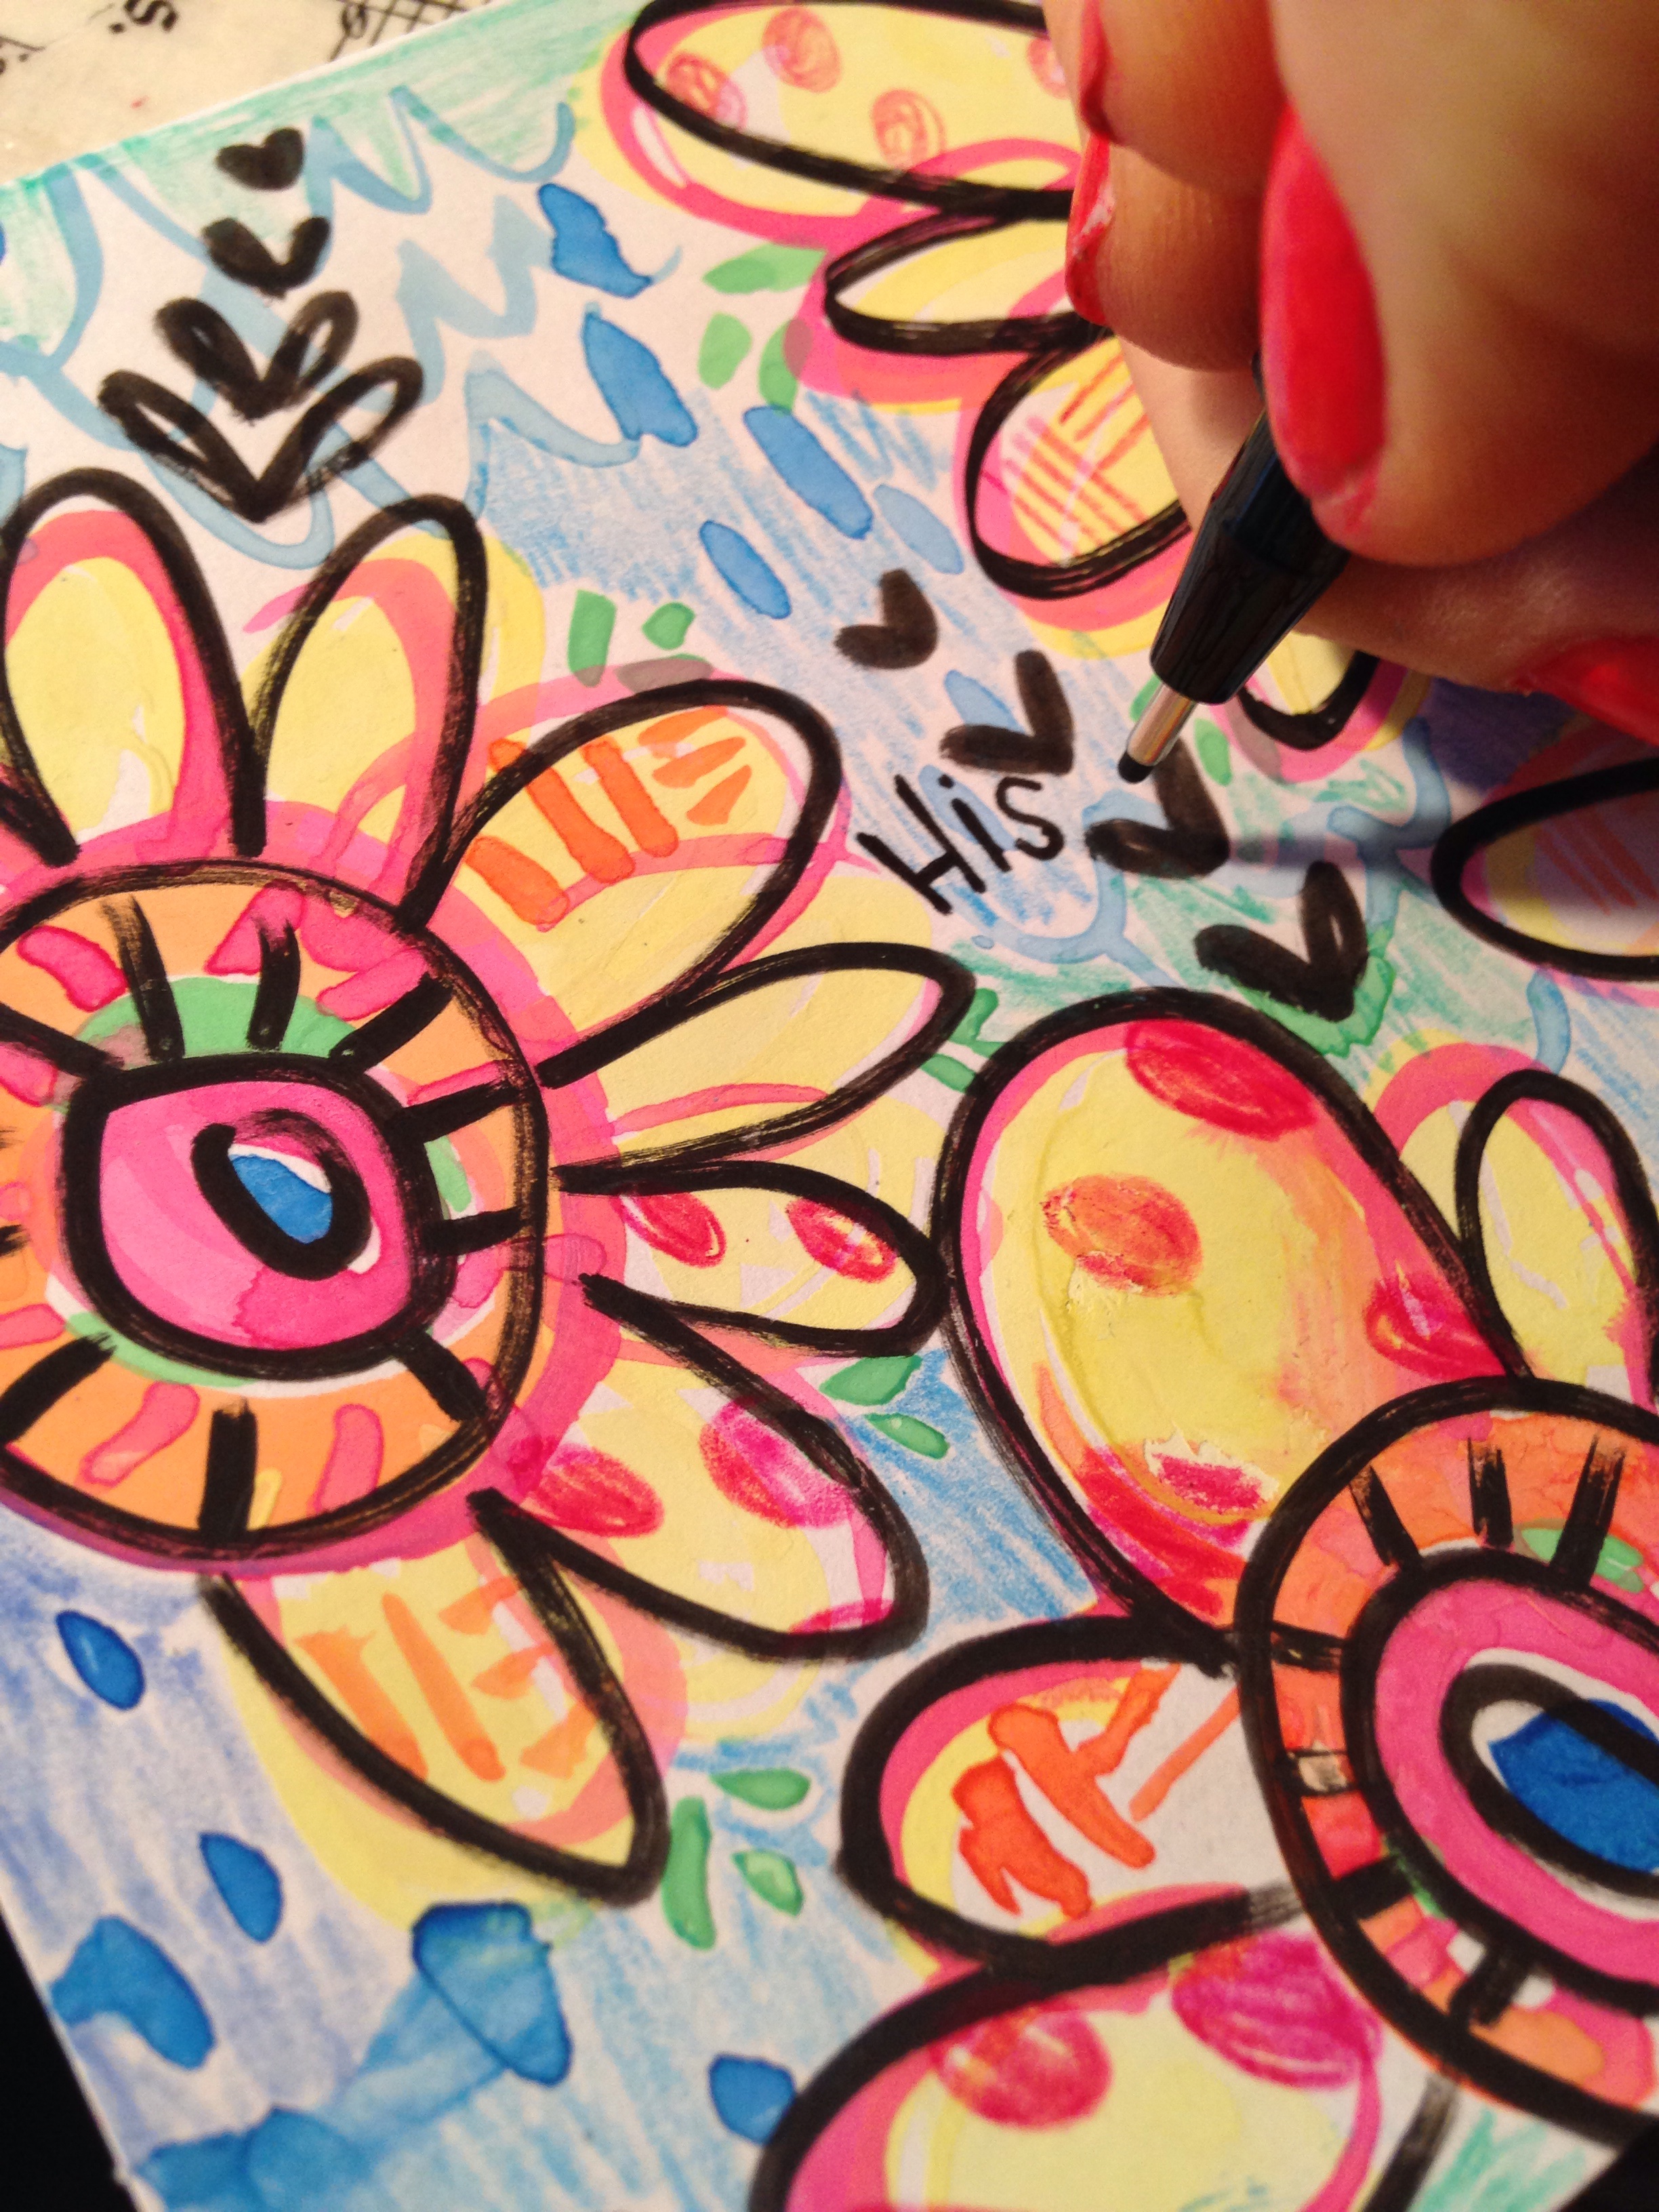
This is a size M faber castell Pen.
I grab my bible and find words I love and write them all around the card, I'm going to be giving this to someone so I think of encouraging words I'd like to see if I was getting it.

Once you've done this, add any last details and you're DONE! Just let it dry and then add your note inside.
This is is the card I created while I water for my paint to dry--


black brush pen
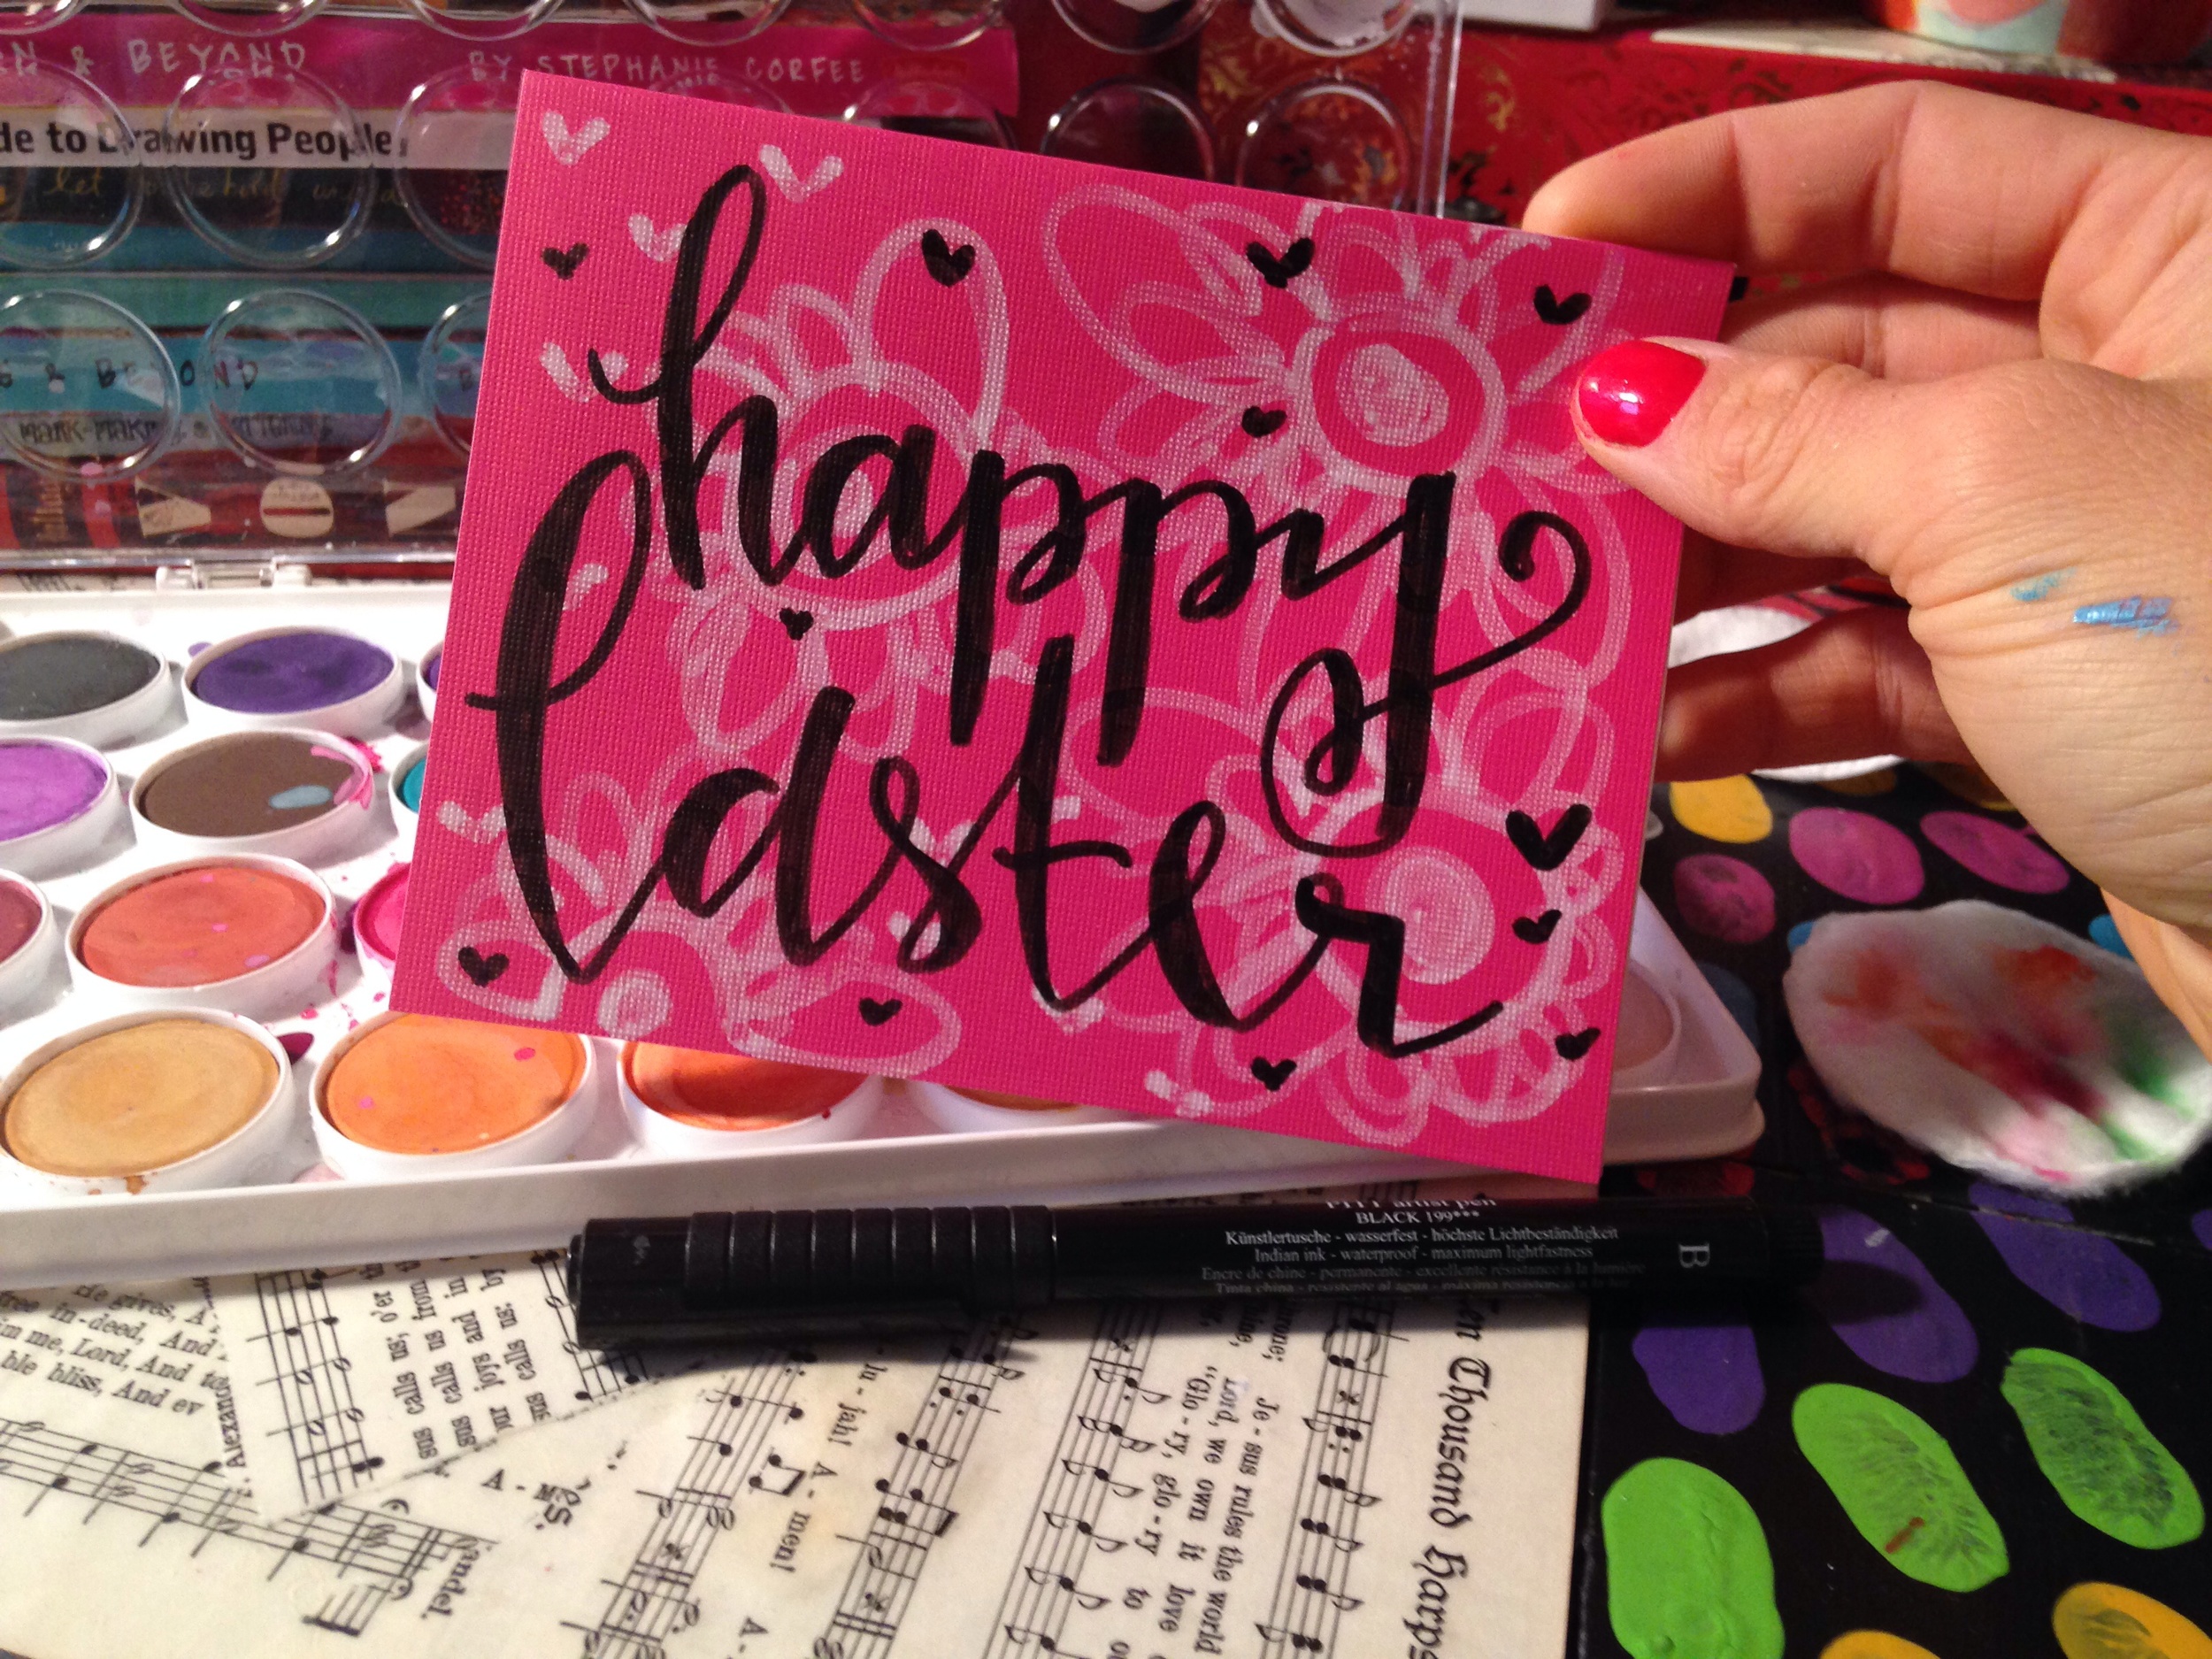
There's my step by step picture tutorial of my Pink Easter card!
Now, free art Friday...

I want to see what you come up with! Make a card today or this weekend using any of these tips or follow the tutorial.
Once you're done load your picture to Instagram and tag me (@valeriewieners) using the tag #vwfreeartfriday or post it on my Art Facebook page.
I will pick one winner to get my watercolor cards I made here, a canvas mini, and two of my acrylic art prints!
Share this tutorial with your friends on social media sites and see what they come up with too!
Happy Making & I hope you learned something new.
-Valerie